Welcome to WordPress. This is your first post. Edit or delete it, then start writing!
Blog
-
Homestead Zoning Questions Before Beginners Buy Land
How Is the Parcel Zoned, and Which Uses Are Allowed?
A parcel’s zoning designation controls more than whether its surroundings look rural. Two neighboring properties can fall in different districts, and a listing described as agricultural, farmable, or unrestricted may not reflect the legally permitted uses. Ask the city or county planning office to identify the district using the parcel number rather than relying on an address, seller statement, or real estate advertisement.
Request the current zoning map, the district regulations, and the permitted-use table. Read the difference between a use allowed by right and one requiring a conditional or special-use permit. A by-right use generally follows a defined administrative process, while a conditional use may involve an application, fees, public notice, a hearing, operating conditions, and an uncertain decision. A landowner may be allowed to grow vegetables by right but need separate approval for a farm stand, campground, event venue, commercial kitchen, or paid workshops.
Minimum parcel size deserves separate attention. A five-acre lot does not necessarily qualify for every agricultural or residential use associated with a rural district. Rules may establish different acreage thresholds for a dwelling, multiple livestock species, subdivision, an accessory dwelling unit, or an agricultural exemption. Ask whether the property is a legal lot of record and whether its present boundaries were lawfully created. A parcel can exist on a tax map without automatically satisfying current development requirements.
Nonconforming uses create another source of confusion. Existing animals, cabins, or businesses may have been lawful before the rules changed, but that status may not transfer cleanly to a new owner or survive a period of discontinued use. Do not assume that seeing a structure or activity on the land proves that you can continue, replace, or expand it.
Bring a plain-language description of the intended homestead to the planner: primary residence, laying hens, dairy goats, greenhouse, produce sales, workshop, and any future second dwelling. Ask the official to mark each activity as permitted, conditional, prohibited, or subject to another department’s review. The common failure is asking only, “Can I farm here?” That broad question can produce a technically accurate yes while leaving the buyer’s most important activities unresolved.
Are Livestock, Crops, and Farm Buildings Permitted?
Livestock rules often turn on species, parcel area, animal density, setbacks, and whether the activity is personal or commercial. A district may permit chickens but exclude roosters, allow horses at a specified stocking level, or require barns and manure storage to remain a certain distance from homes, wells, streams, and property lines. Definitions matter: miniature goats may still count as livestock, and a few animals kept for household food may still trigger animal-control or sanitation rules.
Ask whether limits apply per acre, per parcel, or by animal unit. Then test those rules against the usable portion of the property, not merely its advertised acreage. A ten-acre parcel with wetlands, steep slopes, an access easement, and a large septic reserve area may offer far less room for legal barns, paddocks, and manure handling. A setback measured from a neighboring residence can be more restrictive than one measured from the boundary.
Crop production is usually less constrained than animal keeping, but related activities can change the regulatory category. A household garden differs from a pick-your-own operation with customer traffic. Selling eggs at the gate may be treated differently from operating a scheduled farm stand with signs and parking. Processing poultry, preparing shelf-stable foods, hosting dinners, or running a subscription pickup point may involve health, business, parking, signage, or wastewater requirements beyond the basic zoning district.
Farm structures need equally specific questions. Some jurisdictions exempt qualifying agricultural buildings from parts of the building code, but an exemption should not be mistaken for permission to place any structure anywhere. Zoning setbacks, floodplain requirements, electrical permits, driveway standards, and limits on plumbing or human occupancy may still apply. A pole barn approved for equipment storage cannot automatically become a residence, guesthouse, or commercial workspace.
Use a simple operations sketch when speaking with officials. Show approximate locations for the house, barn, coop, fencing, compost, manure storage, garden, well, septic area, and driveway. The drawing need not be professionally prepared at the screening stage; its purpose is to expose conflicts early. Warning signs include answers that differ between departments, reliance on an informal verbal exception, or a plan that works only if every structure is placed at the smallest possible setback. A viable parcel should leave room for error, maintenance access, drainage, and future changes.
Can You Build and Serve a Legal Home?
Residential eligibility must be confirmed separately from agricultural use. Land can support grazing or crops yet fail to qualify for a new dwelling because of lot status, frontage, access, floodplain rules, water availability, wastewater constraints, or development-density limits. Ask planning staff whether a primary residence is permitted and which agencies must approve the site before a building permit can be issued.
Legal access is the first physical checkpoint. Road frontage shown on a map does not prove that a driveway entrance will be approved, while a private road may involve recorded easements and maintenance obligations. The road authority may regulate sight distance, culverts, entrance spacing, and emergency-vehicle access. If the parcel is reached across neighboring land, have the recorded access document reviewed rather than accepting a visible track as proof of a permanent right.
For land without public sewer service, a septic evaluation can determine whether the homesite is practical. Soil conditions, seasonal water levels, slope, required separation distances, and space for a replacement area can affect approval. A satisfactory general soil description or an old test from another location on the parcel is not the same as current approval for the proposed house. The septic area can also compete with orchards, animal enclosures, heavy vehicle routes, and planned outbuildings.
Private water requires its own review. Ask about well permits, minimum separation from septic components and livestock areas, known local water-quality concerns, and whether existing wells have completion records. A spring, creek, or pond should not be assumed to provide a lawful or dependable household supply. Water-use rights and permitting differ by location, particularly where groundwater or surface-water withdrawals are regulated.
Alternative housing plans frequently expose zoning conflicts. Living in an RV while building, occupying a shed, installing a tiny home, or placing more than one dwelling on the parcel may be restricted even where conventional houses are allowed. Ask about temporary occupancy, dwelling-size standards, manufactured-home rules, foundation requirements, accessory dwellings, and construction time limits. The common mistake is budgeting for a low-cost temporary arrangement before confirming that anyone may legally sleep there. Compare the full approval path—not just the purchase price—when choosing between raw land and a parcel with an existing permitted residence.
What Should You Verify Before Making an Offer?
A disciplined parcel review connects zoning answers to records, site conditions, and the purchase contract. Begin with the parcel identification number and a written description of the proposed uses. Contact planning, building, environmental health, the road authority, and any office responsible for floodplain or onsite wastewater review. In smaller jurisdictions, one person may cover several roles, but the questions remain distinct.
Record the official’s name, department, date, and the code section or map used for each answer. Written email responses are more useful than memories of a phone call, although they may not constitute a binding land-use determination. If the project depends on a disputed interpretation or conditional approval, consider requesting a formal zoning verification and consulting a local land-use attorney or qualified planning professional before closing.
Use this compact due-diligence sequence:
- Identify the parcel: Confirm boundaries, acreage, legal lot status, zoning district, and any overlay districts.
- List intended uses: Include each animal species, dwelling, outbuilding, business activity, sale, event, and temporary living plan.
- Map physical constraints: Locate access, slopes, waterways, flood zones, easements, utility corridors, likely well sites, and septic areas.
- Check private restrictions: Review the deed, subdivision covenants, homeowners’ association documents, leases, and recorded easements.
- Protect the offer: Use contingencies appropriate to zoning, access, survey, title, financing, water, septic, and permit feasibility.
Private restrictions can be stricter than public zoning. A county may allow poultry while recorded covenants prohibit livestock, commercial activity, additional structures, or visible fencing. Easements can reserve part of the land for utilities, access, drainage, or pipelines. Property taxes classified as agricultural also do not prove that a specific homestead plan is permitted; tax classification and land-use approval serve different purposes.
A strong review ends with a feasible site concept and a realistic approval path. It is working when officials can identify applicable rules, the survey and title records agree with the seller’s claims, and the proposed improvements fit without depending on waivers. It is failing when key assumptions remain verbal, the septic area is unknown, access is informal, or the plan requires several discretionary approvals. In that situation, renegotiate the price and terms, extend the review period, revise the plan, or walk away. Closing first and seeking permission afterward transfers nearly all of the regulatory risk to the buyer.
Conclusion
The safest land purchase is based on parcel-specific records rather than rural appearance, listing language, or a seller’s current activities. Define the complete homestead plan, including housing, animals, structures, sales, access, water, and wastewater, then match each element to the responsible office and written rule. Give special attention to conditional uses, legal lot status, septic feasibility, driveway approval, and private deed restrictions because any one of them can change the value of otherwise appealing acreage.
Before committing earnest money beyond a refundable review period, assemble the zoning map, applicable code provisions, title documents, survey information, and agency responses. If the plan depends on an exception, uncertain access, or untested soil, treat that uncertainty as a purchase risk rather than a problem to solve after closing.
Frequently Asked Questions
Does Agricultural Zoning Automatically Allow a Homestead?
No. Agricultural zoning may permit crop or livestock uses without allowing a new residence, every animal species, roadside sales, or unrestricted outbuildings. Verify each proposed use and structure separately.
Can a Real Estate Agent Confirm What I Can Do With the Land?
An agent can help gather records, but land-use confirmation should come from the government offices administering zoning, building, access, well, and septic requirements. Use the parcel number and request written answers.
Do Deed Restrictions Still Apply If Zoning Allows Livestock?
They may. Zoning establishes public land-use rules, while recorded covenants can impose stricter private limits. A title professional or local attorney can help identify and interpret restrictions affecting the parcel.
Can I Live in an RV While Building My Homestead?
Only if local rules permit that occupancy. Some jurisdictions prohibit it, impose a time limit, or require active permits and approved water and wastewater service before an RV can be occupied.
Should a Land Offer Include a Zoning Contingency?
A contingency can give the buyer time to verify intended uses and withdraw or renegotiate if the parcel is unsuitable. Contract language should match local practice and may warrant advice from a qualified real estate attorney.
Further Reading
Authoritative Sources
- FEMA Flood Maps
fema.govProvides official flood-map resources that can help buyers identify mapped flood hazards and related development constraints
- EPA Septic Systems
epa.govExplains onsite wastewater systems, maintenance, and environmental considerations relevant to rural residential parcels
- USDA Web Soil Survey
websoilsurvey.nrcs.usda.govusda.govOffers preliminary soil information for land planning, although local field evaluation is still needed for permits and site design
- Zoning
law.cornell.eduProvides a concise legal overview of zoning concepts, including local regulation of land uses and development

-

Homestead Frost Protection for Beginner Gardeners: Timing
When Should You Protect the Garden?
A frost forecast is a signal to inspect the garden, not a precise measurement of what every bed will experience. Official temperatures are measured under standardized conditions, while leaves close to the soil may become colder on a clear, calm night. Cold air also drains downhill and settles in hollows. A lower bed beside a fence, creek, or pasture depression may frost while a bed uphill remains untouched.
Radiational frost commonly develops when the ground loses stored heat under clear skies and light winds. Clouds slow that heat loss, while wind can mix warmer air downward. Strong wind paired with a larger cold-air mass creates a different problem: covers that merely trap ground warmth may offer limited protection, and loose fabric can whip against plants. Beginners should therefore read the full hourly forecast rather than looking only at the overnight low. Note the expected low, how many hours temperatures may remain near freezing, wind speed, cloud cover, and whether another cold night follows.
Start preparations during daylight and place covers before sunset, while the soil still holds daytime warmth. Waiting until frost is visible means much of that useful heat has already escaped. If the forecast is close to freezing, protect the most exposed and valuable plants first. On a small homestead, that might mean covering two beds of tomatoes and peppers rather than spreading inadequate material over hardy peas, spinach, and established brassicas.
Forecast or Site Condition Practical Response Main Limitation Near-freezing, clear, calm night Cover tender plants before sunset Low pockets may be colder than forecast Several hours below freezing Use well-anchored fabric with an air gap; add protected heat storage if appropriate Thin covers may not hold enough warmth Cold with strong wind Secure covers to rigid supports and seal edges Wind can strip covers and increase heat loss Repeated cold nights Use hoops, a cold frame, or another reusable structure Plants still need daytime ventilation and light A garden thermometer placed at plant height can reveal how your property behaves. Compare readings from an open bed, a low spot, and a sheltered area near a south-facing wall. The goal is not laboratory precision; it is to learn which beds cool first. A common mistake is relying on a calendar-based “last frost date” as a guarantee. Such dates describe historical patterns, not the weather on a specific night, so current forecasts and observed microclimates deserve more weight.
Which Plants Need Protection First?
Protection should follow plant sensitivity, growth stage, and replacement cost rather than treating every crop alike. Warm-season vegetables such as tomatoes, peppers, eggplants, cucumbers, squash, beans, and basil are generally poor candidates for exposure to frost. Fresh transplants and newly emerged seedlings deserve attention because their tender tissues have little mass and can cool rapidly.
Cool-season crops often tolerate cold better, but tolerance varies with species, variety, maturity, and prior exposure. Established kale, spinach, peas, carrots, and some brassicas may handle a light frost better than a recently transplanted tomato. That does not make every young cool-season plant invulnerable. Seedlings raised indoors or in a heated greenhouse may be soft and more easily injured until they have been gradually hardened off.
Use a simple triage order when time or covering material is limited:
- Protect irreplaceable or high-value plants first. Prioritize tender transplants, fruiting plants, and crops that cannot be replanted within the remaining season.
- Address the coldest locations next. Cover plants in low beds, open areas, and sites away from heat-retaining walls or structures.
- Leave genuinely hardy plantings for last. Established cold-tolerant crops usually warrant less effort during a brief, light frost.
Consider a homestead with tomato transplants, direct-sown radishes, blooming strawberries, and mature spinach. If only two covers are available, the tomatoes are the clearest priority. The second cover may go to flowering strawberries because open blossoms can be more vulnerable than dormant crowns. Radishes and acclimated spinach may need no intervention during a minor frost, depending on their condition and the expected low. This crop-by-crop judgment uses limited equipment more effectively than covering the largest beds first.
Look for exposure at the level of the vulnerable tissue. A perennial plant may survive while flowers or new shoots are injured, reducing that season’s crop. Conversely, a small annual can be killed outright if its growing point freezes. Signs of injury often become clearer after thawing: water-soaked areas, darkened leaves, limp stems, and tissue that later turns brown. Do not immediately prune every damaged part. Wait until the plant has thawed and the extent of injury is visible, then remove collapsed tissue with clean tools if decay becomes a concern.
The costly misconception is that more protection is always worthwhile. Covering a large patch of hardy greens while leaving tender seedlings exposed reverses the sensible priority. Match effort to consequence: plant sensitivity, expected conditions, and the realistic ability to replace the crop.
How Do You Cover Plants Without Damaging Them?
An effective cover traps some warmth rising from the soil and limits frost settling directly on plant tissue. It should extend to the ground around the plant, with edges held down by boards, stones, soil bags, or landscape staples suited to the material. Draping a small cloth only over the upper leaves leaves warm air free to escape from below.
Commercial frost fabric is useful because it is lightweight, reusable, and often allows some light and moisture through. Old sheets and lightweight blankets can work for occasional events, although they become heavy when wet. Upside-down buckets, nursery pots, and cardboard boxes suit isolated seedlings if they are weighted against wind. Hoops keep fabric above delicate leaves and make repeated covering faster. Cold frames offer more durable season extension but cost more and require ventilation when sunshine raises the daytime temperature.
Plastic sheeting blocks wind and rain, but bare plastic touching foliage can conduct cold to the leaves and promote localized injury. If plastic is the only available material, support it on hoops or stakes so it does not rest on the crop. A fabric layer beneath it can provide separation during harsher conditions. Keep improvised electric lights, extension cords, and heating devices out of wet garden conditions unless every component is specifically rated and arranged for that outdoor use. Open flames and fuel-burning heaters do not belong beneath makeshift covers.
Soil condition also affects the amount of heat available under a cover. Moist soil generally stores daytime heat better than very dry soil, so watering dry ground earlier in the day may be useful before a radiational frost. Do not soak foliage at dusk or turn already wet soil into mud. Thick, loose mulch insulates roots, but it can also reduce daytime warming of the soil surface. For tender seedlings during a single cold night, a sealed cover over warmed ground often matters more than piling straw around the leaves.
For example, four pepper plants can be enclosed under a simple hoop tunnel with frost fabric reaching the soil on every side. Compare that with wrapping each plant tightly in a grocery bag: the tunnel captures warmth from a wider soil area, avoids leaf contact, and is easier to vent. Check the setup at dusk for open edges, sagging wet fabric, and stakes positioned where wind could tear the cover.
Success is visible the next morning as upright stems and normally colored leaves after the plants have thawed. Failure may show up as a displaced cover, frozen fabric pressed onto foliage, or limp, translucent tissue. Remove or vent covers once temperatures recover, especially in direct sun. Leaving an airtight cover closed can trade frost injury for overheating.
Build a Repeatable Frost-Night Plan
A repeatable routine turns frost protection from a rushed reaction into a manageable homestead chore. Store clean, dry covers in a labeled bin near the garden, along with clips, anchors, hoops, and a flashlight. Measure beds before buying fabric and mark each cover for its intended row. Oversized material can be folded; undersized material usually leaves gaps that undermine the setup.
Begin the day by confirming which crops remain vulnerable and checking the hourly conditions. Water only if the root zone is dry, and do it early enough that foliage can dry. Harvest ripe tender produce that would be lost if protection fails. Before sunset, install supports, drape the covers, and secure all edges. Walk the windward side last because that is where loose fabric often starts to lift.
The following morning is part of the plan, not an afterthought. Wait until frost has thawed before moving material that is frozen to leaves. Then uncover or vent plants as the air warms. Dry damp sheets before storage to prevent mildew, inspect tears, and reset supplies for the next alert. If another cold night is expected, leave hoops and anchors in place so only the fabric must be redeployed.
Repeated frost warnings justify a more durable system. Low hoops with row cover are faster than finding buckets every evening. A cold frame can protect a seedling area and simplify hardening off, while a small unheated greenhouse offers more space but can still fall close to outdoor temperatures overnight. Neither structure should be assumed frost-proof. Their performance depends on air leaks, stored ground heat, wind exposure, and the duration of cold.
Keep brief notes after each event: forecast low, garden thermometer reading, wind, cover used, and visible plant response. After several nights, the record may reveal that the lower squash bed needs protection sooner than the herb bed beside the house. That site-specific knowledge is more useful than copying a neighbor whose elevation, slope, and structures differ.
Weak plans usually fail at ordinary details rather than exotic weather. Covers blow off because edges were not anchored, plants overheat because no one planned morning removal, or every crop is covered despite limited time. Assign the evening setup and morning uncovering before the cold arrives. If labor is scarce, consolidate tender container plants near a protected wall or move portable pots into an unheated shed or garage overnight, provided the space is suitable and plants are returned to light promptly.
Frequently Asked Questions
What temperature should trigger frost protection?
Begin evaluating protection when the local forecast approaches freezing, especially under clear, calm conditions. Tender plants in low spots may become colder than the reported air temperature, so site exposure and plant sensitivity matter.
Can I use bed sheets to protect garden plants?
Yes. Lightweight sheets can trap ground warmth during a short frost if they reach the soil and are firmly anchored. Support them above fragile plants, and dry them before storage if they become wet.
Should I water plants before a frost?
If the soil is dry, watering the root zone earlier in the day may help the ground store heat. Avoid late overhead watering, saturated soil, and the assumption that watering replaces a properly installed cover.
When should frost covers be removed?
Remove or vent covers after frost has thawed and the air warms, particularly when direct sunlight reaches the bed. Do not pull fabric away while it is frozen onto leaves.
Can damaged plants recover after frost?
Recovery depends on whether the growing point, stems, or roots survived. Let the plant thaw, watch for firm green tissue and new growth, and delay major pruning until the full boundary of the damage is apparent.
Conclusion
Reliable frost preparation comes from matching the response to the crop, the site, and the type of cold event. Check hourly conditions, identify low pockets, and reserve the strongest protection for tender transplants, flowers, and crops that cannot be replaced. Install covers while the ground still holds daytime heat, seal them at soil level, and prevent plastic or heavy wet fabric from resting on foliage.
After the cold passes, vent covers, assess plants only after thawing, and record what happened in each bed. Those observations will show where permanent hoops, a cold frame, or a different planting location would save labor. The next practical step is to inventory covering materials, measure vulnerable beds, and assemble anchors and supports before the forecast turns urgent.
-
Beginner Homesteader Weed Control Methods That Work
Identify Weeds Before Choosing a Control Method
Weed identification determines whether pulling, cutting, smothering, or careful cultivation will actually reduce the problem. A plant that reproduces mainly by seed responds differently from one that returns from creeping roots, rhizomes, bulbs, or underground crowns. Beginners do not need to recognize every species immediately, but they should determine whether a weed is an annual, biennial, or perennial before disturbing it.
Annual weeds complete their life cycle through seed production. Young plants are usually easy to hoe or pull, and repeated removal before flowering steadily reduces future seed input. The difficulty is timing: an annual allowed to mature can replace itself with another generation. When flowers or seed heads appear, collect the plant rather than dropping it where mature seed may remain viable.
Biennials commonly form a low rosette during their first season and produce a flowering stalk later. Cutting only the stalk may leave enough crown tissue for regrowth. Removing or severing the crown below the soil surface is more dependable. Perennial weeds require more persistence because underground structures can survive top removal. Digging may work for an isolated taproot, while repeated cutting is often more realistic for a large patch whose roots cannot be removed cleanly.
Observe how the plant grows before acting. A single central root suggests a different removal job than a mat of connected shoots. Check whether the soil is moist enough for roots to release, whether seed heads are present, and whether pulling will disturb nearby crop roots. Photographing the leaves, stem, flower, and whole plant can make later identification through a regional extension resource easier.
A common failure is assuming every unwanted plant should be eradicated immediately. Some volunteer plants protect bare soil, support insects, or indicate a wet, compacted, or frequently disturbed site. Their presence still may be unacceptable in a vegetable row, around an electric fence, or near livestock feed, but the location changes the decision. Unknown plants that could be toxic to livestock warrant identification before grazing, composting, or handling.
Start with a simple field check:
- Life cycle: Is it producing seed once, forming a second-year stalk, or returning from established roots?
- Spread: Does it occur as separate seedlings or connected patches?
- Growth stage: Is it small, flowering, or already carrying mature seed?
- Site: Is it competing with crops, obstructing fencing, or merely covering unused ground?
That short assessment prevents wasted labor and helps keep an ordinary weed problem from becoming a soil-disturbance problem.
Which Weed Removal Method Fits Each Homestead Area?
The best removal method is the least disruptive option that can be repeated at the necessary scale. Hand-pulling is precise around seedlings and perennial plants, but it becomes impractical across a field. A stirrup hoe can clear young weeds between vegetable rows quickly, while mowing controls height and seed production in lanes, fence margins, and rough ground without exposing much soil.
Pull weeds when the ground is damp rather than saturated. Grasp near the soil line and lift steadily to reduce breakage. For a taproot, loosen the surrounding soil with a fork or narrow digging tool first. Avoid wrenching large weeds from directly beside young crops; the weed roots can lift or tear the crop root zone. In that situation, cutting the weed at soil level may cause less damage, even if another cut is needed later.
Hoeing works best on dry, sunny days when weed seedlings are small. Keep the blade shallow so it slices stems just below the surface without bringing a fresh layer of buried seed upward. Deep, repeated cultivation may look thorough, but each pass disturbs soil structure, dries the seedbed, and can expose additional weed seed. It can also chop spreading perennial roots into pieces capable of regrowth. A hoe is therefore well suited to annual seedlings and poorly suited to an unidentified creeping perennial.
Mowing does not remove roots, yet it can stop tall weeds from shading useful plants and may prevent seed maturation when performed early enough. It is a practical choice in orchard alleys, paths, and pasture edges. Mow before seed heads harden, then inspect the area for plants that flower below mowing height. Repeatedly cutting perennials can weaken them over time, but irregular mowing may simply keep the patch alive at a shorter height.
Homestead Area Useful First Method Main Limitation Vegetable rows Shallow hoeing or hand-pulling Deep work can damage crop roots Permanent beds Pulling followed by mulch Mulch will not kill every established perennial Paths and work areas Cardboard and coarse mulch Edges need periodic maintenance Orchard alleys Mowing or managed ground cover Competition near young trees still needs control Fence lines Cutting, trimming, or targeted removal Hardware and wire restrict equipment access Herbicides should not be treated as the automatic next step when manual control is inconvenient. Product suitability depends on the weed, site, nearby crops, livestock access, weather, and label directions. If one is considered, identify the plant first, read and follow the entire label, protect desirable vegetation, and confirm any grazing, harvest, or re-entry restrictions. Broad application is a poor substitute for fixing bare soil, neglected borders, or repeated seed introduction.
How Do Mulch and Ground Cover Suppress Weeds?
Mulch suppresses many weeds by blocking light at the soil surface and making newly germinated seedlings easier to remove. It works most reliably after existing weeds have been pulled, cut, or smothered. Spreading a thin decorative layer over established plants rarely solves the underlying problem; perennial shoots may push through, and annual seedlings can root in decomposed material on top.
In annual vegetable beds, clean straw, shredded leaves, or other suitable organic material can protect soil between crops. Keep mulch away from direct contact with tender stems and inspect it after wind or heavy rain. Material that becomes patchy no longer blocks light evenly. Organic mulch gradually breaks down, which benefits soil cover but also means it must be renewed and may eventually provide a germination surface for windblown seed.
Wood chips are particularly useful on paths and around established perennial plantings, but they are not the same as incorporating woody material into a vegetable seedbed. Leave them on the surface rather than mixing them through the root zone. Newly planted trees and shrubs still need open space around their trunks, and mulch piled against bark can conceal moisture problems or rodents. A broad, level layer is more useful than a mound.
Cardboard beneath coarse organic mulch can help convert a weedy path or small patch of turf. Remove tape and labels, overlap seams, wet the cardboard, and cover it so wind cannot lift the edges. This method is less suitable where aggressive perennial roots can enter from the sides or where water movement and soil drainage are concerns. Plastic sheeting and landscape fabric create different maintenance issues: exposed edges tear, soil accumulates above fabric, and weeds may root through it, making later removal difficult.
Living cover is often the better choice when soil should not remain bare. Closely managed clover, grasses, or regionally appropriate cover crops can occupy orchard alleys, resting garden plots, and other open ground. They still compete for water and nutrients, so keep vigorous vegetation away from young crop plants and tree trunks. In a dry season, a living cover may require mowing or termination earlier than expected.
A useful test is to inspect beneath the cover rather than judging only from above. Successful suppression produces pale, weak seedlings and fewer open gaps. Failure shows up as vigorous perennial shoots, weeds emerging along seams, or a mulch layer thinning enough to expose soil. Correct the gap while it is small instead of adding material blindly across the entire area.
Build a Seasonal Weed-Control Routine
A short, repeated weed patrol requires less labor than occasional large cleanups. The priority is to interrupt reproduction while plants are small, not to make every corner look bare. Walk vegetable beds, propagation areas, fence lines, and animal yards on a regular schedule during active growth, then adjust the interval according to rainfall, temperature, and how quickly weeds are approaching flowering.
Early in the season, mark established perennial patches before surrounding growth hides them. Remove isolated plants while the soil is workable, sharpen hoes, and prepare mulch before crops fill the beds. A shallow pass through a row of tiny annual seedlings may take minutes; waiting until those plants are rooted among vegetables turns the same area into careful hand labor.
During peak growth, divide the homestead into management zones. Give the highest priority to weeds that are seeding, interfering with young crops, contacting electric fencing, obstructing irrigation, or posing a possible livestock concern. Paths and distant borders can wait if the plants are not reproducing or creating an operational problem. This triage matters when weather, harvest, and animal chores compete for the same work period.
- Stop seed first. Bag or securely contain mature seed heads instead of carrying them uncovered across the property.
- Protect high-value plantings. Clear close competition around seedlings, transplants, and young perennial crops.
- Cover disturbed soil. Apply mulch, establish an intended ground cover, or promptly replant the cleared area.
- Recheck persistent patches. Record where perennial shoots return and repeat the chosen control before they rebuild substantial top growth.
Disposal should reflect plant condition. Young, seedless annual weeds may be suitable for a managed compost system, but plants carrying mature seed or viable creeping roots require more caution. A cool or poorly managed pile may not destroy either. Local disposal rules and available facilities vary, so avoid dumping problem weeds along roadsides, stream banks, or property edges where they can establish unnoticed.
Keep a basic record of location, date, method, and result. A phone photo taken from the same point can show whether a patch is shrinking, spreading, or merely staying short. Fewer flowering stems, smaller patches, and easier follow-up removal indicate progress. Continued emergence after cultivation may signal that buried seed is being exposed, while rapid shoots from the same area suggest surviving perennial roots.
The common scheduling mistake is measuring success by a single clean day. Weed pressure reflects accumulated seed, soil disturbance, weather, and adjacent vegetation, so improvement is usually gradual. A workable routine reduces seed return this year, protects productive areas, and steadily replaces bare ground with crops, mulch, or intentional cover.
Frequently Asked Questions
Should I pull weeds before or after rain?
Pull after light rain or irrigation when soil is moist but not waterlogged. Roots release more easily, while avoiding saturated ground reduces compaction and prevents clumps of valuable topsoil from being removed.
Can I leave pulled weeds on the soil?
Small annual weeds without developed seed can often dry on the surface. Remove plants with mature seed heads, fleshy roots, bulbs, rhizomes, or stems capable of rerooting.
How often should a garden be weeded?
Inspect active beds at least weekly during rapid spring and summer growth, with extra checks after rain. The useful interval is the one that catches weeds before flowering and before their roots become entangled with crops.
Does vinegar make a safe natural weed killer?
Vinegar can burn contacted foliage but may not kill established roots, and it can injure desirable plants. Concentrated products can also pose handling risks, so “natural” should not be assumed to mean harmless or site-appropriate.
Is tilling the fastest way to clear a weedy plot?
Tilling can quickly clear annual top growth, but it also exposes buried seed and may spread root fragments from perennial weeds. Identify dominant weeds before deciding whether shallow cultivation, mowing, smothering, or tillage is the better preparation method.
Conclusion
Effective weed management begins with observing how a plant reproduces and deciding how much control its location actually requires. Give immediate attention to weeds setting seed, competing with young crops, obstructing farm systems, or creating an unresolved livestock risk. Use shallow cultivation for small annuals, careful digging for isolated rooted plants, mulch for protected soil, and mowing where acreage makes hand removal unrealistic.
Choose one problem area first and record what grows back after treatment. Cover the cleared soil rather than leaving a fresh seedbed, and inspect edges where weeds commonly re-enter. A clean-looking afternoon is less valuable than a method that can be repeated before flowering. Over successive seasons, preventing seed return and maintaining intentional soil cover should reduce emergency cleanup while preserving time for crops, animals, and other homestead work.
-
Beginner Homesteader Poultry Breed Selection by Purpose
What Job Should Your Poultry Perform?
A first flock should have one clearly defined primary job. Eggs, meat, breeding stock, insect control, and household enjoyment can overlap, but no breed excels equally at every task. Ranking those uses before buying chicks prevents a common mismatch: choosing attractive birds and later discovering that their production, behavior, or processing value does not fit the household.
Egg-focused keepers usually benefit from established laying breeds or laying hybrids with moderate body size and predictable output. Breeds such as Leghorns are efficient layers but may be active and less inclined to tolerate frequent handling. Heavier breeds such as Australorps, Plymouth Rocks, or Orpingtons generally consume more feed, yet their calmer behavior and greater body mass may suit a mixed-purpose backyard flock. Individual birds still vary, and hatchery lines within the same named breed may differ in productivity and temperament.
Dual-purpose chickens are a compromise rather than two specialized birds in one body. Hens can provide household eggs, while surplus males or older birds have more carcass value than lightweight laying stock. They normally grow more slowly and less efficiently than commercial meat strains. That tradeoff can make sense when a homesteader wants to hatch replacements, maintain a breeding flock, or avoid buying a separate batch of meat chicks each season.
Specialized meat birds require a different schedule. Fast-growing meat chickens turn feed into body weight quickly, but they demand close attention to feeders, waterers, bedding, ventilation, and processing dates. Slower-growing meat strains allow a longer management window and may forage more actively, although they use housing and feed for additional weeks. A household that is not prepared to process birds or arrange outside processing should not select meat production as the flock’s main purpose.
Write down the desired annual output and the work attached to it. A family wanting a steady kitchen supply of eggs needs dependable hens, winter housing, nest boxes, and a plan for aging layers. A family wanting occasional home-raised chicken needs brooder space, grow-out housing, freezer capacity, and a firm processing arrangement. The breed name comes after that operational decision, not before it.
Which Traits Matter Most for a First Flock?
Manageability matters more to a beginner than a breed’s highest possible production. Calm birds that tolerate confinement, use nest boxes reliably, and coexist without constant conflict are often more useful than a high-output strain poorly matched to the keeper’s setup. Evaluate the whole behavioral and physical package rather than selecting from an egg-count claim or adult photograph.
Temperament affects routine chores. Flighty birds may clear low fences, resist being moved, and make health checks difficult. Docile birds are easier to handle, but very passive individuals can be bullied in a mixed flock. Size differences intensify that problem: combining bantams with assertive full-size chickens may leave smaller birds pushed away from feed. Beginners usually get a more stable flock by choosing birds of broadly similar size and activity level.
Broodiness deserves deliberate consideration. A broody hen stops laying while she attempts to hatch eggs and may remain on a nest even when no fertile eggs are present. That behavior is inconvenient in a flock maintained solely for table eggs but valuable for a homestead planning to reproduce birds without an incubator. Silkies and some heavy heritage breeds are often associated with broodiness, although no individual hen is guaranteed to set or raise chicks successfully.
Comb type, feathering, mature weight, and feathered feet influence daily care. Large single combs present more exposed tissue during severe cold, while dense feathering can become uncomfortable in sustained heat without shade and airflow. Feather-footed birds may carry mud into housing and require closer inspection when ground remains wet. Very heavy breeds can be less capable of escaping ground predators and may need lower roosts to reduce awkward landings.
Use a short priority check before settling on a breed:
- Purpose: eggs, meat, natural incubation, breeding, or a balanced combination.
- Behavior: calm handling, flock compatibility, noise, and tendency to roam.
- Physical fit: mature size, comb type, feathering, and ability to use the planned roosts and doors.
- Availability: healthy stock from a source that can identify the strain, sexing method, and expected adult characteristics.
A weak selection process treats every representative of a breed as identical. Genetics, rearing conditions, age, social position, and handling all shape performance. Use breed traits to narrow the field, then watch the actual flock for feather damage, uneven body condition, persistent hiding, or birds excluded from feed. Those signs indicate that the combination is failing even if the breeds appeared compatible on paper.
How Do Climate, Housing, and Land Change the Choice?
The property determines which breed traits become advantages and which become recurring chores. Climate labels such as “cold hardy” or “heat tolerant” are useful screening terms, but shelter design, shade, airflow, water access, bedding dryness, and stocking pressure have greater practical influence than a label alone. No breed compensates for a damp, airless coop or an exposed run.
In a cold region, select birds that can remain active in the available winter space and examine exposed comb size, body condition, and roost design. The goal is not to seal the building tightly. Poultry respiration and manure add moisture, so ventilation above the birds helps remove humid air without placing the roost directly in a draft. Heavy, well-feathered chickens may handle cold conditions comfortably, but the same birds can struggle during hot, humid summers.
Heat changes the priority toward shade, unrestricted drinking water, ventilation, and birds with less dense feathering or more exposed comb area. A small urban or suburban run can become hotter than the surrounding air when it has a dark roof, bare soil, or solid walls that restrict circulation. Choosing a heat-tolerant type does not make such housing safe by itself. Persistent panting, wings held away from the body, reduced activity, or crowding near water calls for prompt environmental correction and, when a bird appears ill or distressed, qualified veterinary advice.
Ground conditions also separate chickens from ducks. Ducks can turn the area around an open water source into mud, saturating bedding and increasing cleaning demands. They need water deep enough to immerse and clean their bills, but their housing should still provide a dry resting surface. On a wet property with planned drainage and washable water stations, that behavior may be manageable. Inside a compact chicken run, it can create an exhausting daily maintenance problem.
Predator pressure should influence size and behavior without encouraging false confidence. Alert, active birds may notice danger sooner, yet no breed is predator-proof. Hawks, climbing mammals, digging predators, and loose dogs require physical barriers suited to the local threat. Free-ranging birds also face conflicts with gardens, roads, neighbors, and weather. If the property cannot support supervised ranging or secure perimeter protection, choose birds known to tolerate a roomy enclosed run rather than relying on foraging claims.
Measure the finished housing before ordering poultry. Count usable floor area, roost length, nest locations, door width, feeder access, and the dry outdoor area available during poor weather. A flock is too large when timid birds cannot reach feed, bedding remains wet despite routine care, ammonia odor develops, or feather pecking persists. Reducing numbers often solves more than changing breeds after overcrowding has already become established.
Compare Chickens, Ducks, Turkeys, and Quail
Chickens are usually the most forgiving first poultry species because equipment, feed, replacement stock, and practical information are widely available. Ducks, turkeys, and quail can be productive, but each introduces management requirements that are easy to underestimate. Choosing among them should be based on the property’s constraints and desired food output, not novelty.
Poultry type Common homestead use Management strength Beginner constraint Chickens Eggs, meat, breeding Broad choice of breeds and equipment Scratching can damage gardens and bare runs Ducks Eggs, meat, slug and insect foraging Useful in appropriately drained, wet settings Water management and wet bedding Turkeys Seasonal meat or breeding Large carcass and distinct flock behavior More space, larger equipment, and specialized planning Quail Small eggs and meat Compact housing footprint Escape control, species-specific housing, and smaller food yield per bird Ducks are not simply chickens that enjoy water. Their drinking and feeding behavior splashes moisture, their manure is wet, and their housing needs differ from a chicken coop with high roosts. Some duck breeds are selected primarily for eggs, while heavier types are more appropriate for meat. Noise also varies: a group of vocal female ducks may be unsuitable where neighbors are close.
Turkeys require equipment scaled to their adult bodies and a clear health-management plan. Keeping different poultry species together can complicate feeding, disease control, and housing. A structure that safely accommodates laying hens may have doors, roosts, or nest arrangements poorly suited to mature turkeys. Beginners interested in holiday meat are often better served by planning a dedicated seasonal group rather than adding a few poults to an established chicken flock without separate facilities.
Quail fit compact systems but are not miniature chickens. Their tendency to flush upward affects enclosure design, and their eggs and carcasses are much smaller. They may suit a household that values limited space and accepts smaller individual yields. They are a poor substitute for chickens when the goal is familiar large eggs, garden ranging, or a substantial carcass from each processed bird.
Starting with multiple species multiplies feeders, water systems, dietary decisions, brooding arrangements, and cleanup routines. One well-managed chicken or duck flock teaches observation and seasonal care more effectively than several species competing for unfinished facilities. Add another species only after the first setup remains dry, secure, and easy to service during both ordinary days and severe weather.
Build a Manageable First Flock
A manageable first flock is small enough that housing stays clean and every bird can be observed. Local rules, supplier minimums, climate, and coop capacity affect the exact number, so the better approach is to calculate capacity first and order second. Leave room for temporary separation because an injured, bullied, broody, or newly introduced bird may need its own secure pen.
Limit the first order to one species and preferably one or two compatible breeds with similar mature size. A mixed group can help a household compare behavior and laying patterns, but too many breeds make it harder to identify whether outcomes come from breed, age, health, or individual variation. For example, a small flock split between a calm dual-purpose breed and an active laying breed provides a meaningful comparison without creating a collection of unrelated body types.
Source quality can outweigh a minor breed preference. Ask whether chicks are straight-run or sexed, whether the seller can explain the strain’s intended purpose, and what support is available if identification is uncertain. Straight-run purchases can produce more males than a household can keep. Before ordering, decide how unwanted or surplus roosters will be housed, rehomed, or processed; hoping every chick will be female is not a workable flock plan.
Complete the coop, run, brooder, predator protection, feeders, and waterers before the birds arrive. Test doors and latches, check whether rain reaches bedding, and service the water system while imagining freezing weather or summer heat. Buy feed formulated for the birds’ life stage and species rather than expecting pasture or kitchen scraps to provide a balanced ration. For questions involving illness, unusual mortality, medication, or feed suitability, use a poultry veterinarian, diagnostic service, or local extension resource rather than relying on breed reputation.
During the first months, track practical results: feed consumption patterns, bedding moisture, egg location, shell quality, social conflict, ranging behavior, and time spent on chores. Success looks like birds reaching feed and water without competition, dry resting areas, predictable handling, and output that suits the household. Repeated escapes, muddy housing, unexplained weight loss, persistent bullying, or chores that cannot be completed consistently signal that flock size, facilities, or species choice needs adjustment.
Frequently Asked Questions
What is a good chicken breed for a first-time homesteader?
Australorps, Plymouth Rocks, and Orpingtons are commonly considered for calm, dual-purpose flocks, while active laying strains may suit keepers prioritizing eggs. Choose according to climate, available space, temperament, and local stock quality rather than relying on one universal breed recommendation.
Should beginners choose layers or dual-purpose chickens?
Choose layers when efficient egg production is the clear goal. Choose dual-purpose birds when greater body size, home breeding, or eventual carcass use matters enough to accept slower growth and higher feed use.
Can different poultry breeds live together?
Chicken breeds of similar size and temperament often coexist, provided there is adequate feeder, waterer, roost, and floor access. Mixing species requires more caution because diets, water habits, housing, and disease-management needs can differ.
Are ducks easier than chickens for beginners?
Ducks may suit wet properties and can provide eggs or meat, but they create more water spillage and wet bedding. Chickens are often simpler where dry housing, familiar equipment, and broad local support are priorities.
Is a rooster necessary for a beginner flock?
A rooster is unnecessary for hens to lay table eggs. Keep one only when fertile eggs, natural flock breeding, or another defined purpose justifies the noise, behavior, housing, and local-rule considerations.
Conclusion
Breed choice becomes clearer once the household defines what the flock must produce and what work it can sustain. Prioritize birds whose adult size, behavior, climate tolerance, and housing needs fit the property already available. Treat high egg numbers, rapid growth, broodiness, and foraging ability as tradeoffs with feed demand, seasonal care, processing, or containment rather than isolated benefits.
Before placing an order, measure the housing, confirm a secure water and feeding system, decide how males and aging birds will be handled, and identify a reliable source of appropriately raised stock. Begin with one species and a limited set of compatible breeds. Observe the flock closely through its first seasonal changes, then expand only if bedding stays dry, birds remain healthy and accessible, and daily care still fits the homestead’s actual schedule.
-
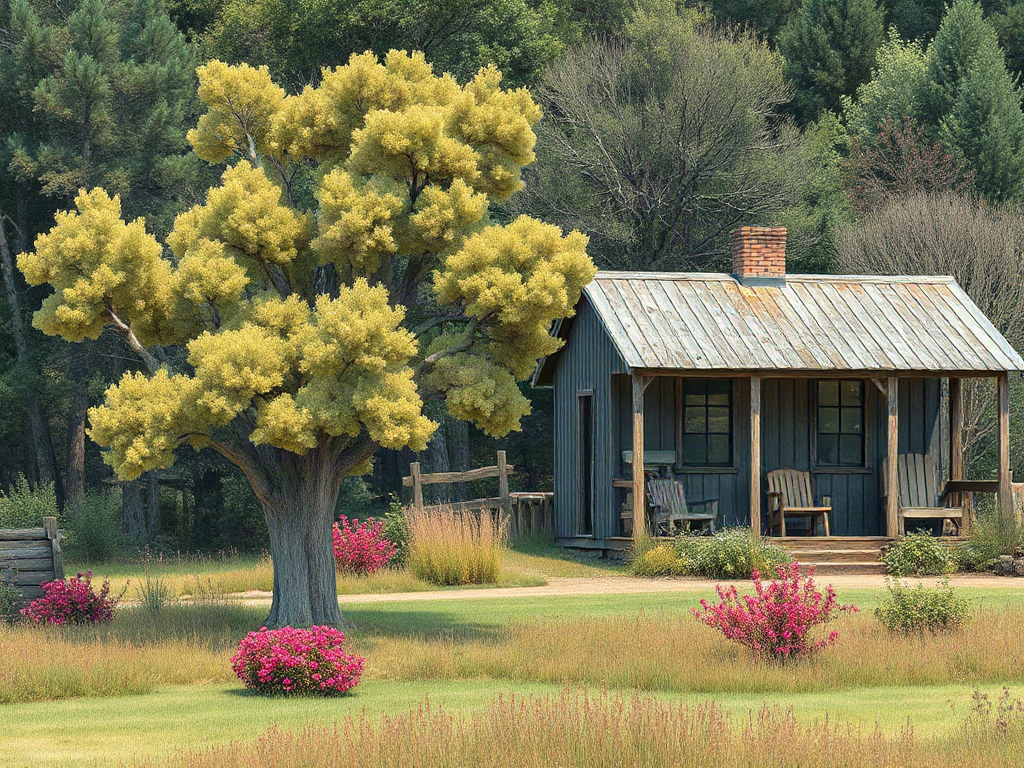
How Much Land Does a Beginner Homesteader Need? Acreage Examples
Why Usable Land Matters More Than Total Acreage
A parcel’s advertised size says little about how much ground can support a beginner’s actual projects. A five-acre property may include a house, driveway, septic area, steep slope, wet ground, mature woods, utility easements, or setbacks where barns and animal enclosures cannot be placed. The remaining workable area is the figure that matters for gardens, poultry runs, orchards, grazing, storage, and compost.
Usable land needs more than open space. Productive areas must receive suitable sunlight, drain adequately, and be reachable with tools, feed, fencing materials, and water. A sunny half-acre beside the house can outperform several remote acres that require long hoses, extensive clearing, or repeated trips through mud. Convenient placement also reduces daily labor. Carrying water and feed an extra few hundred feet may seem minor during a property tour, but it becomes a recurring burden in winter weather or during a busy growing season.
Consider two nominally similar three-acre parcels. The first has a compact home site, level ground, an outdoor faucet near a fenced garden, and a shed close to the poultry area. The second has a larger lawn but poor drainage near the house, shade across the garden site, and no practical route for a delivery truck to reach a future barn. The first parcel offers less visual space yet supports more efficient production.
Beginners sometimes assume unused woodland or rough pasture can be converted later without much difficulty. Conversion can require tree removal, grading, drainage work, fencing, soil improvement, or machinery access. Those costs should not be treated as free future acreage. Wooded ground may still provide privacy, fuelwood, habitat, or shade, but it should not be counted as immediate garden or grazing capacity.
When comparing listings, sketch the property into functional zones: residence and utilities, intensive growing space, animal areas, storage and work areas, access routes, and land that will remain unmanaged. Measure the zones rather than estimating them by sight. A smaller parcel with a high percentage of accessible, well-sited ground is often the better beginner property.
How Much Acreage Fits Different Homestead Goals?
Homestead acreage should be matched to specific enterprises rather than to a vague ambition of becoming self-sufficient. Vegetables, laying hens, fruit trees, dairy animals, and grazing livestock place very different demands on space, water, fencing, feed storage, and labor. A household that plans to buy hay needs less pasture than one determined to grow most of its animals’ forage.
Beginner Goal Practical Starting Range Primary Constraint Kitchen garden, compost, and a few hens About 0.25–1 usable acre Sun, water, setbacks, and neighbor compatibility Large garden, poultry, berries, and small orchard About 1–3 usable acres Layout, irrigation, fencing, and seasonal labor Garden plus goats or sheep with purchased feed About 2–5 usable acres Shelter, durable fencing, manure, and dry lots Pasture-dependent livestock Often more than 5 acres Forage productivity, rotation, climate, and winter feed These are planning ranges, not stocking guarantees. The carrying capacity of pasture varies with rainfall, soil, plant growth, slope, season, and management. A fixed animals-per-acre rule can therefore mislead buyers. Local extension offices, soil information, and experienced agricultural service providers can help assess whether a particular field is productive pasture or merely open ground.
Gardens are far more space-efficient than grazing animals, but they still need working room. Paths, crop rotation, compost, tool access, wash areas, propagation space, and deer protection occupy ground that does not appear on a seed packet. An intensive vegetable plot can produce useful household food from a modest footprint, while trying to cultivate an oversized garden often creates weeds, neglected harvests, and wasted irrigation.
Small livestock do not automatically have small land requirements. Goats may challenge weak fences and damage young trees. Poultry areas can become bare and muddy if birds remain concentrated in one place. Pigs can disturb soil rapidly. A beginner who buys feed can keep animals on less land, but that choice shifts the burden from pasture acreage to recurring feed costs, storage, drainage, bedding, and manure management.
Choose acreage by writing down the first enterprises you will actually establish. A realistic sequence might be a garden and hens in year one, berries and an expanded compost system in year two, and a small orchard in year three. Land needed for an uncertain future dairy herd should not outweigh water reliability, housing condition, and affordability today.
How Should a Beginner Evaluate a Homestead Parcel?
A useful parcel evaluation begins with legal use, water, soil, drainage, sunlight, and access—not with the number printed in the listing. A property can be affordable and attractive while still preventing the buyer’s intended animals, structures, or roadside sales. Rules may differ between counties, municipalities, subdivisions, and deed-restricted communities, so verbal assurances from a seller or neighbor are not enough.
Contact the applicable planning or zoning office with precise questions. Ask whether the intended livestock are permitted, how many may be kept, where shelters and fences can be located, and whether permits apply to barns, farm stands, wells, ponds, or additional dwellings. Confirm the answers against current official documents. Also review recorded easements, deed restrictions, and any association rules that may affect agricultural activity.
Water deserves equal scrutiny. Note the source, expected capacity, location, seasonal reliability, and distance to each planned use. A productive garden can require frequent irrigation during dry weather, while animals need dependable water every day. Inspecting a parcel after rain can reveal pooling, runoff paths, and muddy gateways that are invisible during a dry showing. If the property relies on a well or septic system, appropriate local professionals should evaluate those systems before purchase.
Use a compact parcel checklist during each visit:
- Map restrictions: setbacks, easements, septic reserve areas, flood-prone ground, and utility corridors.
- Mark resources: sunny ground, water points, existing fences, sheds, wind protection, and vehicle access.
- Test assumptions: investigate soil, drainage, well condition, and the cost of repairing structures or fencing.
- Walk daily routes: trace the trip from the house to animals, garden, feed storage, compost, and roadside delivery points.
- Estimate conversion work: price clearing, gates, water lines, shelter, and soil improvement before calling land usable.
A common failure is spending the property budget on acreage and leaving too little for infrastructure. Secure fencing, frost-protected water delivery where needed, gates, tools, storage, and drainage work can determine whether a homestead functions. Comparing total acquisition and setup costs gives a clearer picture than comparing price per acre alone.
Should You Buy Extra Land for Future Growth?
Some reserve land is valuable, but buying substantially more acreage than you can maintain may create expense without improving the homestead. Property taxes, fencing, invasive plants, storm damage, brush control, equipment needs, and longer travel routes continue even when an area produces nothing. The better target is enough room for defined projects, operational buffers, and one or two plausible expansions.
Labor usually limits beginners before land does. A large garden reaches peak workload when weeds, irrigation, harvesting, and food preservation compete for attention. Animals add fixed morning and evening duties, including weekends and bad weather. Orchards require protection, pruning, and monitoring even before they produce much fruit. Expanding all of these at once can turn adequate acreage into a poorly managed property.
A phased site plan protects against that problem. Place the first garden near water and regular foot traffic. Reserve adjacent ground for rotation or expansion rather than cultivating it immediately. Position feed storage so deliveries do not cross the garden, and keep animal handling areas accessible to a vehicle. Leave enough separation between livestock and food-growing areas to manage manure, mud, pests, and runoff appropriately.
Signs that the current scale is working include completing routine chores without persistent backlog, maintaining fences before escapes occur, controlling weeds before they seed, and handling harvests without chronic waste. Warning signs include repeatedly empty water containers, muddy confinement areas, unused garden rows, deteriorating shelters, accumulated manure, and dependence on emergency purchases. Those problems usually call for better systems or fewer enterprises, not more acreage.
Leasing nearby pasture, buying hay, using a community garden, or purchasing certain foods may be more rational than owning land for every input. A household can raise vegetables and poultry on a compact parcel while sourcing meat, grain, or winter feed from local producers. This approach trades maximal independence for lower purchase costs and a more manageable workload.
Before making an offer, draw a three-year map and budget. Label every planned structure, growing area, water line, gate, storage location, and access lane. Add contingency space for crop rotation, quarantine or temporary animal separation, compost, and construction access. If the plan fits with comfortable margins and the recurring workload is credible, the parcel is likely large enough. If it works only by using every corner immediately, the design has too little resilience.
Frequently Asked Questions
Can you homestead on one acre?
Yes. One well-arranged acre can support a substantial garden, composting, berries, dwarf fruit trees, and permitted poultry. It is generally less suitable for pasture-dependent livestock, especially when the house, septic system, and setbacks occupy much of the parcel.
Is five acres enough for a small homestead?
Five usable acres can accommodate several beginner enterprises, but the answer changes with terrain, water, zoning, and livestock goals. Treat wooded, steep, wet, inaccessible, or restricted areas separately from productive acreage.
How much land is needed to grow most household vegetables?
The required area varies with household size, diet, climate, crop choices, and gardening methods. Begin with a manageable sunny plot, keep harvest records, and expand only after learning how much produce the household uses and preserves.
Do goats require several acres of pasture?
Not necessarily if feed is purchased, but goats still need secure fencing, shelter, exercise space, dry footing, and a manure plan. Land alone does not determine stocking capacity; forage, season, climate, and management are decisive.
Should a beginner buy the largest property they can afford?
Usually not. Preserve funds for water systems, fencing, repairs, storage, tools, and emergencies. A smaller functional parcel with reliable infrastructure often provides a better start than more acreage that needs extensive conversion.
Conclusion
Choose a homestead parcel by mapping usable ground against specific projects, not by chasing the highest acreage within the budget. Verify legal uses, water capacity, soil conditions, drainage, sunlight, access, and infrastructure costs before treating any area as productive. Then build a three-year plan that introduces gardens, poultry, orchards, or other enterprises in stages.
The strongest beginner property leaves financial and physical room for mistakes. It has convenient chore routes, space for rotation and storage, and enough reserve capacity that every square foot is not committed on day one. Walk prospective land in different conditions, take measurements, consult the relevant local offices, and price essential improvements before making an offer. Acreage is only useful when the household can legally, affordably, and consistently manage it.
-

Beginner Homesteader Chicken Housing Requirements—Space, Ventilation, and a Predator-Check Plan
Size the Coop for the Flock and Climate
Coop capacity should be based on usable floor area rather than the building’s outside dimensions. Feeders, waterers, storage bins, nest structures, and inaccessible corners reduce the space chickens can actually occupy. For standard-size laying hens, roughly 4 square feet of usable indoor floor area per bird is a sensible starting point. Bantams may manage with less, while large breeds, confined flocks, and birds kept through severe winters generally need more.
Outdoor access changes how indoor space is used but does not make a cramped coop harmless. Chickens may spend most daylight hours in a run during pleasant weather, then remain indoors during heavy rain, deep snow, wildfire smoke, predator activity, or flock-health restrictions. A six-hen flock in a nominal 24-square-foot coop may be workable if the entire floor is accessible and the birds have dependable outdoor access. The same footprint becomes tight when several square feet are occupied by equipment or when the hens must stay inside for days.
Watch the flock rather than treating a space ratio as a guarantee. Repeated feather pecking, birds blocking others from feed or water, excessive manure concentration, and hens sleeping in nest boxes can indicate crowding or poor interior arrangement. More floor area will not correct every behavior problem, but insufficient room makes avoidance difficult for lower-ranking birds.
The run also needs enough area to prevent rapid deterioration. A small bare run can become muddy, manure-laden, and difficult to sanitize, especially around the door and water station. Where land permits, divide outdoor space into two pens and rest one while the other is used. On a compact property, roof part of the run, add well-draining footing, and move the waterer away from traffic bottlenecks. Free-ranging offers more room but exposes birds to predators, gardens, roads, and neighboring properties; it is not a substitute for secure housing.
Before buying chicks, draw the interior to scale and mark the floor occupied by equipment. The Beginner homesteader chicken housing requirements should then be checked against the adult flock size, not the small amount of room chicks initially use. Building for planned adult numbers avoids an expensive expansion after the first season.
Control Moisture, Drafts, and Temperature
Dry air and dry bedding usually matter more than making a chicken coop warm. Chickens release moisture through breathing, while droppings and spilled water add more humidity. In an under-ventilated building, that moisture condenses on cold walls and roofing, dampens litter, increases ammonia odor, and can contribute to frostbite during freezing weather.
Place permanent ventilation high on opposing walls or beneath protected eaves so warm, moisture-laden air can escape. Openings should be covered with securely fastened hardware cloth and shielded from driving rain. Air movement above the birds is desirable; a direct stream of winter air across roosting chickens is not. This distinction explains why sealing every crack can be as troublesome as leaving a large unprotected opening beside the roost.
A simple morning inspection reveals more than a thermometer alone. Check for condensation beneath the roof, wet patches around the waterer, dark or matted bedding, and a sharp odor near bird height. Ammonia that is obvious when the door opens calls for immediate bedding, ventilation, and stocking-density corrections. Adding fragrance or simply topping wet litter with a thin dry layer hides the warning without removing its source.
Insulation can moderate temperature swings, but it introduces tradeoffs. Exposed foam and fiberglass must be enclosed because chickens peck accessible material, and hidden wall cavities can shelter rodents. In many climates, a well-ventilated, weather-tight wooden coop without supplemental heat is easier for a beginner to manage than a tightly sealed insulated structure. Heat lamps add fire risk around dust, feathers, and bedding; if unusual cold makes supplemental heat necessary, use equipment designed for livestock spaces and install it so birds cannot contact it or damage the wiring.
Hot weather requires a different airflow plan. Shade the coop and run, open larger screened vents or windows, and avoid dark roofing that absorbs strong afternoon sun where summers are intense. Provide cool drinking water in more than one location so a dominant bird cannot control access. Panting, wings held away from the body, and reluctance to enter a hot coop signal that shade and air exchange are inadequate. Climate-specific adjustments should be part of any review of Beginner homesteader chicken housing requirements, because a design suited to a dry northern winter may perform poorly in humid summer heat.
Build Around Roosting, Nesting, and Daily Chores
Interior fixtures should support natural chicken behavior without making cleaning difficult. Chickens prefer to sleep above the floor, so provide stable roost bars with enough linear space for the flock. A broad, smooth wooden perch is generally easier for birds to grip than narrow wire or slick pipe. Position roosts higher than nest boxes, because hens commonly choose the highest available sleeping place.
Leave clearance from walls and between parallel perches so feathers and tails are not pressed against dirty surfaces. Avoid placing feeders, waterers, or nest-box entrances directly below a roost. A removable droppings board beneath the perch can simplify morning cleanup, but it must be scraped regularly. If it becomes a manure shelf, it concentrates moisture and odor near sleeping birds.
Nest boxes should be darker and quieter than the main floor while remaining convenient to inspect. About one box for every four or five laying hens often works because hens tend to share favored boxes, although flock behavior varies. More boxes do not necessarily stop floor eggs if boxes are bright, exposed, dirty, or difficult to enter. Add a small front lip to retain nesting material and block access at night if birds begin sleeping in the boxes.
Design the building around the caretaker as well as the chickens. A person-sized door, reachable corners, removable fixtures, and a floor that tolerates scraping reduce the temptation to postpone cleaning. Place water where spills can be noticed and corrected quickly. Hanging a waterer may reduce bedding contamination, but it must remain at a height every bird can reach. Exterior-access nest boxes save time, yet poorly fitted lids can leak rain or create a pry point for raccoons.
A compact pre-flock check keeps functional details from being missed:
- Access: Confirm that every corner, perch, and nest can be inspected without dismantling the coop.
- Water: Fill the waterer and look for drips, tipping, and wet bedding over several hours.
- Night layout: Verify that all birds can perch without crowding over nests or equipment.
- Cleaning: Test whether soiled litter and manure can be removed through the door with ordinary tools.
A decorative miniature coop may look suitable in a photograph while failing these tests. Choose a plain structure with workable access over an ornate design that has narrow doors, sealed windows, and unreachable floor space. Signs of a good layout include clean nest material, evenly used roosts, clear walking routes, and chores that can be completed without moving several fixtures.
Create a Predator-Resistant Coop and Run
Predator protection must address climbing, digging, prying, reaching, and attacks from above. Chicken wire is useful for containing chickens, but its thin openings are not a dependable primary barrier against many predators. Use heavier welded hardware cloth on windows, vents, run openings, and other vulnerable areas, fastening it with screws and washers or secure battens rather than relying only on light staples.
Examine the enclosure from the outside at ground level. Gaps beneath doors, warped corners, loose roof edges, and openings around eaves are common entry points. Raccoons can manipulate simple latches, while rats and smaller animals exploit surprisingly modest gaps. Use two-step or lockable latches where dexterous predators are present, and store feed in a durable container with a tight lid. Spilled grain attracts rodents even when the coop itself appears secure.
Digging pressure can be managed with a buried barrier or an outward-facing hardware-cloth apron secured around the perimeter. An apron is often easier to install on rocky ground because it extends horizontally beneath soil, gravel, or turf rather than requiring a deep trench. Either method can fail if gates, corners, and transitions are left unprotected. Walk the entire perimeter after installation instead of assuming the long straight sections are the only places that matter.
A covered run offers stronger protection from hawks and climbing animals than an open pen. Lightweight bird netting may deter some aerial approaches but does not provide the same resistance as a framed, securely attached roof. Where snow is expected, roof framing must also carry local snow loads; a flat improvised cover can collapse onto the flock. If a fully secure run is not affordable immediately, prioritize a sound nighttime coop and use supervised outdoor time until the run can be completed.
Test security before the chickens move in. Close the coop at dusk, pull firmly on every door and access panel, inspect for visible light through unintended gaps, and check the perimeter after rain for erosion. Then repeat the inspection regularly for gnawing, rust, loose fasteners, disturbed soil, and roof damage. Automatic doors reduce daily scheduling pressure, but they still require manual checks for blocked tracks, power problems, and birds left outside. The safest beginner system combines solid construction with a nightly head count rather than treating automation as supervision.
Frequently Asked Questions
How much coop space does each chicken need?
About 4 square feet of usable indoor space per standard-size laying hen is a practical starting point. Increase it for large breeds, prolonged indoor confinement, severe weather, or equipment that occupies floor area.
Does a chicken coop need heat in winter?
Healthy, cold-hardy adult chickens often manage without added heat in a dry, draft-protected, ventilated coop. Extreme climates or vulnerable birds may require additional measures, but dusty bedding makes improvised heat lamps a serious fire concern.
Can chicken wire protect a coop from predators?
Chicken wire primarily contains birds and may not withstand predators that tear, pry, or reach through it. Hardware cloth is the stronger choice for vents, windows, run walls, and other exposed openings.
How many nest boxes are needed for six hens?
Two well-placed boxes are usually adequate for six hens because laying hens commonly share preferred nests. Keep the boxes clean, dim, accessible, and lower than the sleeping roosts.
How can I tell whether a coop has enough ventilation?
Dry bedding, no persistent ammonia odor, and no roof condensation are positive signs. Damp litter, strong morning odor, wet walls, or frost inside the building indicate that moisture removal or stocking density needs attention.
Conclusion
A successful first coop is measured by how reliably it protects chickens and how easily it can be maintained, not by decorative details. Calculate space after subtracting fixtures, provide high ventilation without directing drafts across the roost, and arrange nests, perches, water, and doors around natural behavior and routine cleaning. Use hardware cloth, secure latches, protected edges, and a digging barrier suited to the soil and predators on the property.
Before birds arrive, test the water system, inspect every opening from outside, and practice closing and cleaning the building. Once the flock moves in, treat dry bedding, clean air, calm roosting, and an undisturbed perimeter as performance checks. Correct wet areas, crowding, loose fasteners, and predator signs early; small housing defects become harder to manage after chickens establish their daily routine.
-
Prepper Versus Homesteader Explained for Beginners (Goals, Skills, and a Starter Plan)
The Core Difference Between Prepping and Homesteading
Prepping is organized around interruptions: a power outage, contaminated water supply, winter storm, evacuation, income loss, or delayed access to stores. The prepper asks what the household will need if a familiar service becomes unavailable. Supplies and plans are then arranged to bridge that gap, whether it lasts several hours or several weeks.
Homesteading is organized around production and household capability. A homesteader may grow vegetables, keep laying hens, preserve seasonal food, mend clothing, compost organic material, maintain tools, or heat with locally obtained firewood. These activities are not limited to emergencies. They become recurring parts of the household economy and usually demand scheduled labor throughout the year.
The distinction is easiest to see through food. A prepper might store shelf-stable meals, canned protein, rice, cooking fuel, and water for a temporary disruption. A homesteader might improve soil, plant potatoes and beans, manage pests, harvest the crop, and pressure-can suitable foods. Stored supplies offer immediate reliability, while food production requires land or containers, suitable weather, equipment, experience, and time before a harvest appears. A failed crop cannot replace a pantry during an emergency already underway.
The same contrast applies to energy. A portable battery, fuel reserve, flashlights, and a safe heating plan are preparedness measures. Cutting, seasoning, storing, and regularly burning firewood forms a productive household system. Both can be useful, but each carries different constraints. Batteries must be charged and eventually replaced; wood heat involves chimney maintenance, safe storage, physical work, and local rules.
A common misconception treats preppers as people who merely accumulate gear and homesteaders as people who live entirely from their land. Neither stereotype is reliable. Effective preparedness includes skills, maintenance, rotation, and realistic plans. Modern homesteaders commonly use utilities, stores, hired services, and outside income. The useful question is not which identity sounds better, but whether a household is building short-term reserves, ongoing production, or a deliberate combination of both.
Where the Two Lifestyles Overlap
Preppers and homesteaders meet at the point where stored resources, practiced skills, and dependable routines reinforce each other. Food preservation, first aid, water storage, cooking without grid power, tool care, weather awareness, and household repairs all serve normal life while reducing vulnerability during a disruption.
Consider a household with a vegetable garden. Gardening alone does not guarantee preparedness because harvests are seasonal, weather-dependent, and vulnerable to disease or animals. The garden becomes more useful when the household also keeps drinking water, stores staple foods, preserves surplus safely, saves appropriate seed, and knows how much produce it actually eats. Preparedness covers the period before harvest; homestead production can replenish part of what is consumed.
Water provides another clear example. Rain barrels may supply a garden, but untreated roof runoff should not automatically be considered drinking water. A sound household plan separates irrigation from potable-water needs and accounts for collection surfaces, storage cleanliness, treatment capability, freezing weather, drought, and local requirements. The prepper perspective asks how much safe water is available immediately. The homesteading perspective asks how water moves through the property during a normal season.
Skills also need physical support. Knowing how to preserve food is valuable only when the correct jars, lids, tested process, heat source, and sound ingredients are available. Owning preservation equipment without practicing creates a different weakness. A small batch completed under ordinary conditions reveals timing, storage, cleanup, and quality-control problems before the process is needed under pressure.
Integration works best when projects have everyday value. A pantry stocked with foods the family regularly eats is easier to rotate than a cache of unfamiliar emergency meals. A garden planted with useful crops is more defensible than a large assortment chosen for novelty. A freezer alarm, labeled shutoff valves, smoke and carbon-monoxide alarms, and maintained hand tools may deliver more practical resilience than an expensive specialty purchase.
Readers comparing the two approaches can use Prepper versus homesteader explained for beginners as a household audit: reserves answer immediate shortages, production replaces selected inputs over time, and practiced routines connect the two. Failure usually appears when one side is assumed to compensate automatically for the other.
Which Approach Fits Your Household
The better starting emphasis depends on housing, time, health, local hazards, household size, and financial margin. An apartment resident may gain more from water storage, a compact pantry, backup lighting, renter-safe cooking options, and an evacuation plan than from attempting intensive food production. A rural household with a well, animals, long supply routes, and frequent outages may need both deeper reserves and systems for water, feed, fencing, heat, and backup electricity.
Prepping generally produces faster coverage. A weekend spent checking alarms, storing water, organizing medications, charging power banks, and adding familiar shelf-stable meals can address immediate gaps. Its weakness is depletion: stored goods run out, batteries discharge, fuel ages, and plans become obsolete if they are never reviewed.
Homesteading usually develops more slowly. Soil improvement may take multiple growing seasons, fruit trees take time to bear, and livestock create daily obligations before they provide dependable food. The benefits can extend beyond emergencies through fresher produce, useful exercise, lower waste, or greater control over selected household inputs. The cost is continued attention. Animals still need care during illness, travel, extreme weather, and financial strain.
Use four filters before selecting a project:
- Need: Does it address a likely disruption or a recurring household expense?
- Capacity: Do you have safe space, time, mobility, water, and storage?
- Continuity: Can someone maintain it during busy weeks or an emergency?
- Verification: Can you test whether it works before relying on it?
A working system leaves evidence. Pantry foods are consumed and replaced before quality declines. A backup light remains charged and accessible. Garden records show which crops produce reliably in the available space. Preserved food is processed by an appropriate tested method and stored without seal failures. Warning signs include unopened gear, expired supplies, neglected animals, oversized gardens, hidden recurring costs, and plans that depend on a single capable person.
Do not finance an imagined version of self-reliance while ignoring current necessities. Debt pressure, unsafe wiring, deferred roof repairs, or inadequate insurance can pose greater household risk than the absence of a greenhouse or generator. Begin with high-consequence basics, then expand only when earlier systems remain affordable and maintained.
A Practical Starter Plan for Beginners
A beginner plan should establish a modest safety margin before adding labor-intensive production. Start by identifying the disruptions that actually fit the household: short power failures, severe weather, wildfire evacuation, frozen pipes, boil-water advisories, or temporary loss of income. Local emergency-management information and the home’s own service history are better inputs than dramatic scenarios with little connection to the area.
First, inventory what is already present. Check drinking water, ordinary pantry meals, necessary medications, pet supplies, sanitation items, flashlights, charging options, first-aid materials, fire extinguishers, and weather-appropriate bedding or clothing. Record expiration dates and note whether every household member can find and use the items. This prevents duplicate purchases while exposing basic gaps.
Second, create a small reserve based on normal consumption. Add food gradually during routine shopping, favoring items the household knows how to prepare. Include a manual can opener and account for cooking requirements. Store water in suitable containers and follow current public-health guidance on storage and treatment rather than improvising during an outage. Anyone dependent on refrigerated medicine, powered medical equipment, or mobility support needs an individualized backup plan developed with relevant providers and service organizations.
Third, add one productive skill with a manageable maintenance burden. Container herbs, a small bed of salad greens, bread baking, basic sewing, composting, or freezing seasonal produce can reveal whether the household enjoys the work and can sustain the routine. Raising animals or buying acreage is not a beginner requirement. A six-pot balcony garden maintained through summer teaches more than an abandoned plot that was too large from the start.
Fourth, test the plan under safe conditions. Prepare dinner from stored food, locate utility shutoffs, use backup lights for an evening, and calculate how quickly stored water is consumed. Do not create dangerous tests by disabling essential heat, medical support, refrigeration, or communications. Record what was inconvenient, missing, or difficult to operate.
Finally, set a review interval. Seasonal checks work well because weather, food use, clothing, animal needs, and evacuation routes change. The internal comparison in Prepper versus homesteader explained for beginners should lead to a balanced sequence: immediate safety, reliable reserves, practiced procedures, and only then larger production systems. Progress is visible when supplies rotate naturally, skills are used without crisis, and no single project overwhelms the household budget or calendar.
Frequently Asked Questions
Can someone be both a prepper and a homesteader?
Yes. A household can store emergency supplies while gardening, preserving food, repairing equipment, or keeping livestock. The combination is strongest when reserves cover immediate needs and productive systems are maintained throughout the year.
Do you need rural land to become a homesteader?
No. Renters and urban households can grow food in containers, cook from basic ingredients, preserve seasonal produce, reduce waste, repair belongings, and build useful household skills. Land expands options but also adds expense and maintenance.
Is prepping mainly about buying emergency gear?
No. Useful preparedness combines supplies with maintenance, household plans, safe storage, communication, and practice. Gear that is inaccessible, expired, unsuitable, or unfamiliar may provide little value during a disruption.
Should a beginner start with food storage or a garden?
Establish a modest supply of familiar food and safe water first because a new garden cannot meet immediate needs. Add a small growing project afterward so skills develop without placing the household’s food security on an uncertain first harvest.
How much self-sufficiency is realistic?
Most households remain connected to stores, utilities, health care, transportation, and outside income. A realistic goal is reducing selected vulnerabilities and producing some useful resources, not eliminating every outside dependency.
Further Reading
Authoritative Sources
- Build a Kit
ready.govFederal preparedness guidance identifies practical supplies households can assemble for common emergencies
- Water, Sanitation, and Hygiene Emergencies
cdc.govCDC information helps readers plan for safe water and sanitation when normal services are disrupted
- National Center for Home Food Preservation
nchfp.uga.eduResearch-based preservation instructions support safer canning, freezing, drying, and fermenting practices
- The People’s Garden
usda.govUSDA gardening resources offer a useful starting point for household-scale food growing and stewardship
Conclusion
Choose projects according to the function they serve rather than the label attached to them. Cover drinking water, ordinary food, sanitation, medical dependencies, lighting, communication, and local evacuation needs before investing in ambitious production. Then add one household skill or system that fits the available space and can survive busy weeks, poor weather, and budget pressure.
Review supplies, test equipment safely, and track whether productive projects deliver usable results. A small pantry that rotates, a practiced outage plan, and a garden the household can maintain are stronger than unused equipment or an oversized project. The practical next step is a written inventory followed by one corrected gap and one manageable skill project. Expand only after both continue working under normal household conditions.
-

Small Homestead Budget Breakdown for Beginners With First-Year Cost Examples
Build the Budget Around the Property
The property determines which homestead expenses are unavoidable. A lower purchase price does not necessarily produce a lower operating budget if the parcel needs a well repair, extensive fencing, drainage work, an electrical upgrade, or an all-weather access road. Beginners should evaluate those functional systems before allocating money to raised beds, poultry housing, fruit trees, or equipment.
Housing payments, property taxes, insurance, utilities, and routine home maintenance form the household baseline. They remain due regardless of whether the garden produces food or hens lay consistently. Renters and existing homeowners can use their current monthly costs as a starting point. Buyers should estimate the new property on its own terms rather than assuming expenses will resemble those of a conventional suburban home.
Water deserves separate scrutiny because it affects the house, crops, and animals. A functioning household tap does not prove that a well or municipal connection can support summer irrigation. Check the water source, delivery distance, storage capacity, pressure, and condition of pumps or pipes. Hauling water can make an otherwise inexpensive garden or livestock plan costly and labor-intensive. If the property relies on a septic system, its condition and maintenance schedule also belong in the acquisition budget rather than the gardening category.
Use three figures when comparing parcels: the cost to occupy the property, the cost to correct essential deficiencies, and the cost to begin the first production project. For example, a parcel with sound fencing and usable outbuildings may justify a higher price than bare land requiring immediate infrastructure. Conversely, an old shed has little budget value if its roof leaks, its floor is unsafe, or local rules prevent its intended use.
Before committing money, verify zoning, animal restrictions, setback requirements, water rights where applicable, and permit rules with the relevant local offices. These details vary by jurisdiction and can change what is feasible. A sound Small homestead budget breakdown for beginners treats legal use and essential property systems as prerequisites, not unexpected costs discovered after construction begins.
Separate Startup Purchases From Recurring Expenses
Startup and recurring costs behave differently, so combining them hides the true monthly burden. A chicken coop may be a one-time build, but feed, bedding, pest control, replacement hardware, and occasional health care continue. Garden fencing may last for years, while seeds, compost inputs, irrigation repairs, and preservation supplies return each season.
Create four budget columns: initial setup, monthly operation, seasonal purchases, and replacement reserve. Place each expense in the column that reflects when cash will actually leave the household. This method reveals projects that look affordable at the store but create an ongoing obligation. Livestock is the clearest example because the purchase price of an animal can be much smaller than the cost of maintaining suitable shelter, fencing, feed, and care.
A compact planning checklist should include:
- Property baseline: housing, taxes or rent, insurance, utilities, fuel, and household repairs.
- Infrastructure: water delivery, fencing, shelters, storage, electrical work, and access improvements.
- Production inputs: seeds, soil amendments, plants, animals, feed, bedding, and pest protection.
- Processing and storage: jars, lids, freezer space, drying equipment, bins, and rodent-resistant containers.
- Contingency: veterinary care, crop replacement, broken pumps, storm damage, and material price changes.
Tool purchases require similar discipline. A shovel, garden fork, pruners, wheelbarrow, hose, and basic repair tools can cover many small-property jobs. Specialized machines may save time, but ownership adds fuel, maintenance, storage, and repair exposure. Renting a tiller once or hiring a tractor for a defined earthmoving task may cost less than maintaining equipment used only a few hours each year.
A common mistake is treating food produced at home as free after setup. Eggs still carry feed and bedding costs; vegetables use water, fertility, trellising, and preservation materials. Home production may provide freshness, control, resilience, or personal satisfaction even when it does not beat supermarket prices. Budget decisions improve when those benefits are acknowledged without pretending every project creates immediate savings.
Compare Realistic First-Year Project Costs
First-year examples should be built from local prices rather than universal dollar claims. Lumber, fencing, feed, soil amendments, utility rates, and contractor labor vary widely. The useful comparison is the structure of each project: what must be purchased before production begins, what is consumed continuously, and what could fail or require replacement.
A Small In-Ground Garden
An in-ground garden may require a soil test, seeds or transplants, compost or another appropriate amendment, irrigation supplies, hand tools, mulch, plant supports, and wildlife protection. Existing fertile soil and a nearby hose reduce setup demands. Compacted ground, persistent weeds, poor drainage, or deer pressure can turn a seemingly simple plot into an infrastructure project.
Raised beds offer defined growing space and may improve access or solve localized soil problems, but bed materials and imported growing media increase initial spending. Building several large beds before testing sunlight, irrigation coverage, and crop performance risks locking money into the wrong location. A smaller trial plot provides better cost information for the next season.
A Beginner Laying Flock
A few hens require secure housing, ventilation, roosts, nest space, predator-resistant hardware, feeders, waterers, feed storage, bedding, and an appropriate outdoor arrangement. Chicks add brooding equipment and a delay before egg production, while started pullets generally cost more upfront. Egg output also changes with age, season, breed, nutrition, and health, so grocery savings should not be treated as guaranteed income.
Compare that commitment with buying eggs locally while developing the garden first. The alternative may feel less ambitious, but it preserves cash and reduces daily chores. Adding hens later, after fencing and feed storage are ready, is often financially cleaner than improvising facilities after the birds arrive.
Perennial Fruit
Fruit trees and berry plants spread their return over multiple years. The first-year budget may include plants, guards, stakes, mulch, irrigation, pruning tools, and protection from wildlife. Young plants can fail because of poor site selection, neglected watering, browsing, disease, or unsuitable varieties. Buying many plants at once magnifies those risks.
Start with a few varieties suited to local conditions and confirm pollination requirements before ordering. University or county extension resources can help identify regionally appropriate planting practices without promising a specific harvest. The Small homestead budget breakdown for beginners becomes more credible when delayed production, losses, and maintenance are counted alongside the purchase price.
Control Cash Flow With Phased Projects
Phasing protects the household budget from several projects demanding cash at the same time. A practical first year might prioritize water reliability, basic repairs, a small garden, and one storage improvement. Poultry, an expanded orchard, or larger fencing work can follow after the household has observed the property through changing seasons.
Seasonal observation has financial value. Spring may reveal standing water, summer exposes irrigation limits, autumn shows where leaves and runoff collect, and winter tests access and utility reliability. Installing beds, shelters, or permanent fencing before observing those patterns can lead to relocation and duplicate spending. Waiting is not inactivity when it prevents the wrong infrastructure from being built.
Assign each proposed project a spending ceiling and a completion condition. A garden expansion, for example, should wait until the existing plot has dependable irrigation, manageable weeds, useful yields, and enough household time for harvesting. A larger flock should wait until current feed use, cleaning time, predator pressure, and egg consumption are documented. These conditions tie expansion to demonstrated capacity rather than enthusiasm.
Cash reserves should remain separate from planned project money. A contingency fund is not an unused fence budget; it exists for failures that threaten animals, water, shelter, transportation, or household stability. The appropriate amount depends on the property and activities. Livestock, private wells, older outbuildings, and long distances from services generally create different repair exposure than a garden-only property connected to municipal utilities.
Used materials can reduce costs when their condition is verified. Sound gates, stock tanks, hand tools, and metal roofing may offer value, but damaged fencing, rotted lumber, leaking containers, or unsafe electrical components can create more work than savings. Free materials also carry transport and storage costs. Price the complete usable result, not merely the acquisition cost.
Signs that phasing is working include bills paid without using consumer debt, completed projects before new ones begin, stable maintenance routines, and enough time to use or preserve what is produced. Warning signs include unfinished shelters, animals acquired before secure housing, recurring emergency purchases, spoiled harvests, and project spending that displaces taxes, insurance, utilities, or essential repairs.
Track Results and Correct an Unworkable Budget
A homestead ledger should connect spending with the project that caused it. Broad labels such as “farm supplies” make it difficult to tell whether the garden, hens, orchard, or workshop is absorbing more money than expected. Record the date, item, amount, project, and whether the expense was startup, operating, seasonal, or corrective.
Track noncash results as well. A garden may provide vegetables, but it also consumes hours for watering, weeding, harvesting, and preserving. Hens may supply eggs and manure while requiring daily care and limiting travel flexibility. Recording labor does not require assigning yourself a formal wage; even a simple weekly hour total helps show whether the scale fits the household.
Review the ledger monthly during the first year and after each production season. Compare planned and actual spending, then identify the reason for each meaningful difference. A higher feed bill may reflect waste, rodents, flock growth, or inaccurate consumption assumptions. Repeated plant replacement may point to poor watering, wildlife damage, or varieties unsuited to the site. The correction should address the cause rather than merely increasing next year’s allowance.
Do not judge a new project solely by its first harvest. Infrastructure often makes year one unusually expensive, while durable tools and fencing may serve later seasons. At the same time, avoid assuming every startup cost will eventually pay for itself. Some activities remain lifestyle expenses, especially when operated at a very small scale. That is acceptable if the household chooses the expense knowingly and can sustain it.
When the budget is failing, pause expansion and rank obligations by consequence. Protect housing, utilities, water, animal welfare, insurance, taxes, and critical repairs first. Reduce optional purchases, shrink annual growing space, postpone new species, or sell equipment that creates more maintenance than value. A revised Small homestead budget breakdown for beginners should reflect actual use after several months, not defend estimates that the property has already disproved.
Frequently Asked Questions
What should a beginner budget for first?
Fund housing, utilities, water, insurance, taxes or rent, and urgent property repairs before production projects. Next, choose one small project and price its complete setup, recurring inputs, and likely repairs.
Is a garden or chickens cheaper to start?
An in-ground garden often has fewer continuing obligations when suitable soil, water, and basic tools already exist. Chickens require secure housing, feed, bedding, and daily care regardless of egg output.
Should land purchase costs be included in the homestead budget?
Yes. Keep acquisition and housing costs separate from project spending, but assess them together. Financing, taxes, insurance, utilities, access, water, septic needs, and essential repairs determine how much cash remains for production.
How much contingency money does a small homestead need?
No single amount fits every property. Base the reserve on exposure to well failures, older buildings, livestock care, fencing damage, vehicle dependence, and distance from repair services rather than using a universal percentage.
When should a beginner add another homestead project?
Add a project after the current one fits the available money, time, water, storage, and maintenance capacity. Repeated emergency purchases, unfinished infrastructure, or unused harvests indicate that expansion should wait.
Conclusion
A workable first-year plan protects the household before funding production. Verify the property’s water, access, legal use, utilities, and essential structures, then separate setup purchases from monthly and seasonal obligations. Begin with one limited project whose full cost and workload can be observed.
Use local prices, preserve a genuine repair reserve, and record spending by project. After each season, compare assumptions with feed use, harvest volume, maintenance demands, losses, and labor. Expand only when the existing operation is stable and useful. If costs rise faster than expected, reducing scale is usually better than financing unfinished infrastructure or compromising animal care. The next practical step is to inspect the property, list mandatory household expenses, and price one garden, poultry, or perennial planting plan from setup through its first full year.
-
C Mon Homesteading: Keeping It Real With Honest Budgets, Daily Chores, and Setbacks
What Keeping It Real Looks Like on a Homestead
Authentic homestead life is visible in ordinary decisions: whether to repair a fence before expanding the garden, whether the freezer has enough room for a harvest, and whether someone can cover animal chores every morning and evening. Finished barns and full baskets show outcomes, but they do not reveal the labor, expense, timing, or compromises behind them. A realistic account connects the appealing result to the routine that produced it.
The phrase “keeping it real” should not mean focusing only on hardship. Constant disaster can distort homesteading as much as constant perfection does. A balanced picture includes useful wins, preventable errors, routine maintenance, abandoned ideas, and projects that worked only after being reduced in scale. If six laying hens reliably fit the household’s feed budget and chore schedule, that may be a stronger result than maintaining a large flock that creates surplus eggs, bedding problems, and an exhausting cleaning load.
Three questions help separate a durable practice from a staged accomplishment. What did the project consume? Who performs the recurring work? What happens during illness, severe weather, travel, or equipment failure? Consider a summer garden photographed at peak production. The fuller story includes seed-starting space, irrigation, pest pressure, harvest frequency, preserving time, and what happened to produce that ripened faster than the household could process it. Those details make the result useful to another grower.
Scale also changes what “real” means. A household on a small lot may focus on herbs, compost, repairs, food preservation, and careful purchasing. A rural property may add livestock, pasture management, firewood, water systems, or larger storage needs. Neither model is automatically more self-reliant. The better test is whether production matches available space, labor, climate, and consumption.
Readers evaluating C Mon Homesteading: keeping it real should look for operational details rather than a particular aesthetic. Dates, quantities, maintenance intervals, reasons for changing course, and clear distinctions between experimentation and proven routines all strengthen credibility. A common mistake is treating visible busyness as evidence of productivity. Productive work leaves the household with food, repaired infrastructure, improved soil, reliable systems, or knowledge that changes the next decision.
The Budget Behind Food, Animals, and Repairs
A homestead budget is most accurate when it separates setup purchases, recurring expenses, and replacement costs. Combining them hides the difference between a costly first year and an activity that remains expensive indefinitely. A chicken coop may be a one-time build, while feed, bedding, predator protection, health needs, and periodic repairs continue. Eggs have household value, but that value should not be confused with cash profit.
Food production carries similar accounting problems. A tomato bed can use lumber, soil amendments, seed, trellising, irrigation parts, jars, lids, energy, and hours of processing. Some supplies serve for years, so charging their full cost to one harvest can exaggerate the expense. Ignoring them entirely creates the opposite error. A simple ledger can assign each purchase to setup, annual operation, or replacement, then record harvest amounts and the food actually eaten or preserved.
A compact monthly check should cover:
- Cash out: feed, seed, fuel, veterinary care, amendments, packaging, and repair materials.
- Useful output: eggs eaten, produce stored, meat placed in the freezer, or purchased services avoided.
- Losses: spoiled food, failed seedlings, predator damage, broken tools, and unused supplies.
- Labor pressure: tasks delayed, weekends consumed, and seasonal bottlenecks requiring outside help.
Labor belongs in the assessment even when no wage changes hands. It may be reasonable not to price every family hour as hired labor, especially when gardening or preserving is personally satisfying. Yet time still determines whether a system can continue. Processing a large fruit harvest during the same week that fencing needs repair creates a capacity problem, regardless of how inexpensive the fruit was.
Budget comparisons should also account for quality and purpose. Homegrown herbs may cost more than bargain dried herbs but offer freshness and varieties unavailable locally. Raising poultry may provide manure, pest scratching, household enjoyment, and eggs, even if it does not beat supermarket pricing. Those benefits are legitimate when named honestly; they become misleading when presented as automatic savings.
The practical priority is to protect the household before expanding production. Maintain an emergency reserve, keep essential housing and utility obligations separate, and avoid financing speculative projects on the assumption that future sales will cover them. The warning signs are accumulating feed bills, deferred repairs, unused equipment, and production without a storage or sales outlet. A sound budget narrows choices early, before enthusiasm turns into an expensive obligation.
Daily Chores That Determine Whether Projects Last
Recurring chores, not construction day, determine the true size of a homestead project. Building raised beds or bringing home animals creates a visible milestone. Watering, cleaning, feeding, inspecting, harvesting, preserving, and repairing continue after the novelty disappears. The correct starting scale is the amount a household can maintain during its busiest ordinary week, not the amount it can launch during a free weekend.
Animal care makes this constraint obvious. Water can freeze, feeders can jam, fencing can fail, and predators do not respect work schedules. A routine must include direct observation rather than merely filling containers. Reduced appetite, unusual posture, damaged fencing, wet bedding, or changes in manure may signal that attention is needed. Owners should establish local veterinary contacts and learn species-appropriate care before acquiring animals; online accounts cannot replace professional advice for illness or injury.
Gardens have different timing but the same operational pressure. Missing one weeding session may be recoverable, while delaying irrigation during heat or leaving ripe cucumbers for several days can sharply reduce usable output. Preservation creates another deadline. A garden sized around planting ambition rather than harvest capacity often produces waste precisely when the household is too busy to can, freeze, dry, or share the crop.
A useful weekly rhythm assigns work by consequence. Life-support tasks such as water, feed, shelter, and animal checks come first. Time-sensitive harvests and irrigation follow. Repairs that prevent larger failures rank above cosmetic improvements. Optional expansion stays last. For example, reinforcing a sagging gate is a better use of an hour than starting a new compost bay when that gate is the weak point in livestock containment.
Backup coverage is part of the system, not an afterthought. Written feeding amounts, shutoff locations, medication instructions, gate procedures, and emergency contacts allow another person to perform essential chores. Instructions should be tested while the primary caretaker is available. A plan that makes sense only to its author is not yet reliable.
The common failure mode is adding several enterprises at once. New hens, a larger garden, beehives, and a preserving schedule each have separate learning curves and peak demands. Staggering additions exposes the actual workload before the next commitment. Signs that the scale fits include chores completed without chronic rushing, clean and functional infrastructure, manageable harvests, and money reserved for routine inputs. Repeated skipped tasks, deteriorating enclosures, spoiled produce, or resentment toward daily care indicate that reduction or redesign is overdue.
How to Use Setbacks Without Romanticizing Them
A setback becomes valuable only when it changes the next decision. A failed crop, escaped animal, spoiled batch, or broken water line is not automatically a lesson; it first needs an accurate account of conditions, actions, and consequences. Blaming “bad luck” can hide a preventable weakness, while blaming the homesteader for every loss ignores weather, disease pressure, material defects, and other limits that cannot be fully controlled.
Start by separating the immediate event from the underlying vulnerability. Suppose seedlings die after an unexpectedly cold night. The event was low temperature, but the vulnerability may have been planting too early, relying on one forecast, lacking row cover, or putting every seedling outside at once. The next move could be holding backup plants, staggering transplant dates, or choosing a later schedule. Buying a larger greenhouse would be a disproportionate response unless the household’s production goals justify its cost and maintenance.
Good records turn memory into usable evidence. Note the date, weather, variety or animal involved, observed symptoms, relevant inputs, action taken, and result. Photographs can document fence damage, plant progression, drainage, or equipment assembly. Keep the record factual before adding conclusions. “Leaves wilted after transplanting on a windy afternoon” is more useful than “this variety is terrible,” because several possible causes remain open.
Public honesty has boundaries. Sharing a failed hatch, pest outbreak, or budget overrun can help readers see the risks concealed by a finished result. It should not substitute for qualified veterinary, food-safety, electrical, structural, or legal guidance. Nor should an unresolved incident be presented as a universal method. Clearly labeling an experiment protects readers from copying a response that happened to coincide with recovery.
The opposing mistake is turning every setback into proof that homesteading is futile. Some failures are expected during skill development, and others reveal that a method does not suit a particular climate, property, or schedule. The decision is whether to repeat, modify, outsource, or stop. Repeating makes sense when the cause is identifiable and affordable to correct. Outsourcing may be wiser for dangerous tree work or specialized electrical repair. Stopping is rational when an enterprise repeatedly drains money and attention from more dependable household priorities.
The strongest version of C Mon Homesteading: keeping it real treats correction as part of competence. Keep what produces a dependable return, redesign what creates recurring strain, and release projects maintained mainly for appearance. Realism does not lower standards; it directs effort toward systems that remain safe, useful, and manageable after conditions become inconvenient.
Frequently Asked Questions
What Does “Keeping It Real” Mean in Homesteading?
It means showing the labor, recurring expenses, losses, maintenance, and compromises behind useful results instead of presenting only finished projects and successful harvests.
How Should a Beginner Choose a First Homestead Project?
Choose one project that meets an existing household need, fits current space and time, and can be maintained through a busy week. Herbs, a modest garden bed, composting, or basic food preservation often reveal capacity without creating a large obligation.
Does Growing Food at Home Always Save Money?
No. Savings vary with setup costs, climate, yields, waste, and what the household normally buys. Track expenses and food actually used, while separately noting freshness, variety, enjoyment, and other noncash value.
What Is the Best Sign That a Homestead Project Is Too Large?
Repeatedly skipped care is the clearest warning. Spoiled harvests, dirty housing, deferred repairs, rising input bills, and dependence on emergency effort indicate that the project should be reduced or redesigned.
How Can Homesteaders Learn From Failure?
Record conditions, actions, costs, and outcomes; identify the vulnerability behind the event; then decide whether to repeat, modify, outsource, or stop. Avoid drawing universal conclusions from a single attempt.
Conclusion
Credible homesteading is built around capacity rather than appearance. Track recurring costs separately from setup expenses, size each enterprise for the labor available on difficult weeks, and protect essential chores before adding optional projects. Keep records detailed enough to distinguish weather, timing, maintenance, and planning errors instead of labeling every disappointing result as bad luck.
The next useful step is small and measurable: review one current project for its monthly cost, weekly hours, backup coverage, usable output, and most likely failure point. Repair the weak part before expanding. If the project repeatedly competes with animal welfare, household finances, food safety, or necessary maintenance, reduce it without treating that decision as defeat. A smaller system that functions through heat, fatigue, schedule changes, and ordinary setbacks delivers more value than a larger one sustained by constant recovery.